Sanding a Teak Deck


Sanding a teak deck is part of a vessel’s maintenance program. So it’s essential to know why to sand, when not to sand, and how to sand.


WHY SAND A TEAK DECK?

The primary reason for sanding a teak deck relatively smooth is to allow moisture and contaminants to run off the decks rather than become entrapped on the deck surface.


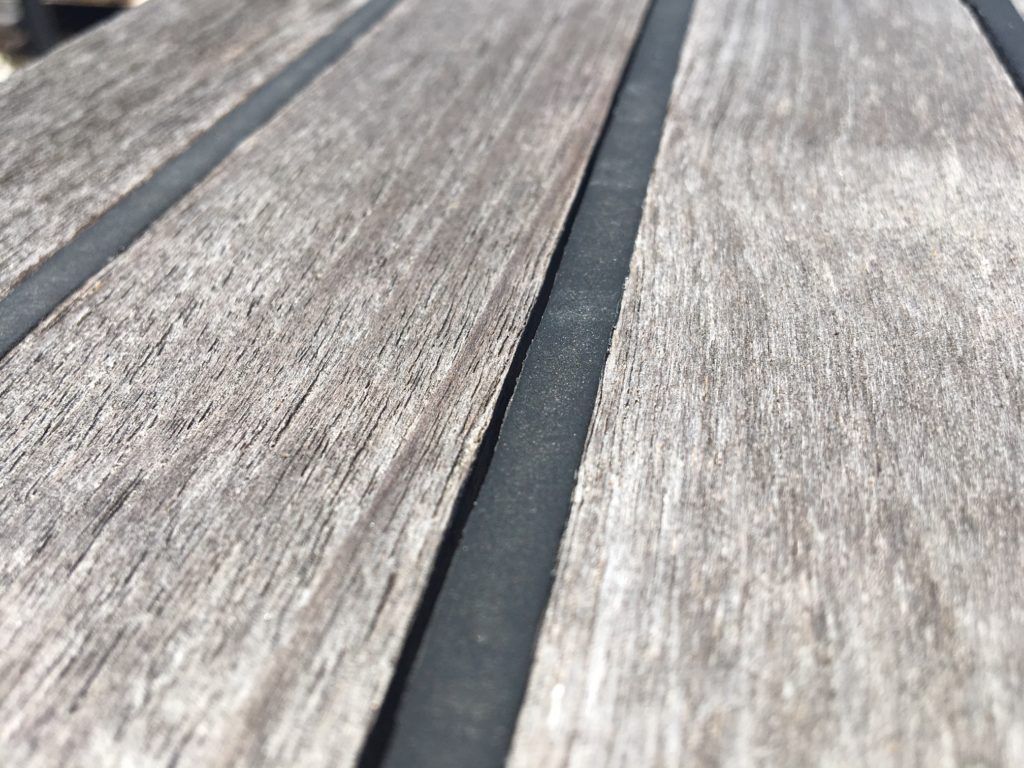
Teak, like all woods, can decay. The softwood between the grain lines wears and deteriorates faster than the hardwood of the grain lines. As a result, the wood develops a raised grain or rough surface.tionships with all the yards—they all know us, so that helps simplify a lot of situations,” he adds.

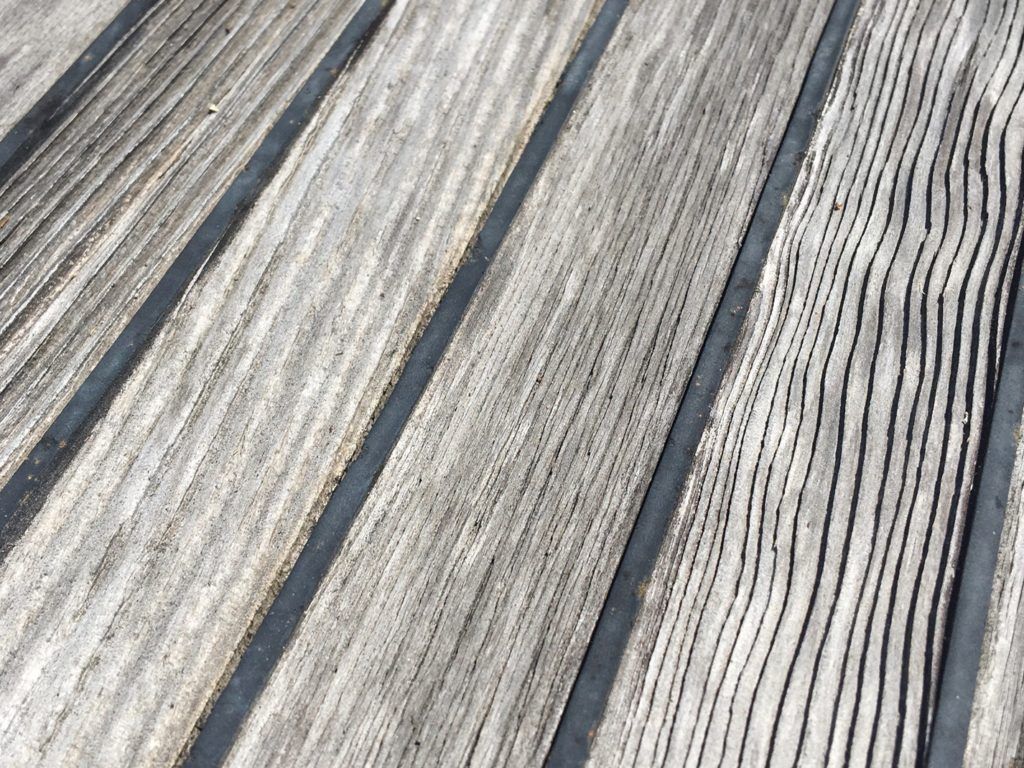
Extreme Ridges of Teak Decking Battens


Ridges trap rainwater and air pollutants in the valleys between the ridges rather than running cleanly off the deck. Note that when rubber caulking is proud on the teak deck surface, it can have the same effect. In the valleys, the decay process accelerates for softwood because it stays wet longer.


Another reason for sanding is to remove stains that are resistant to quality teak cleaners.
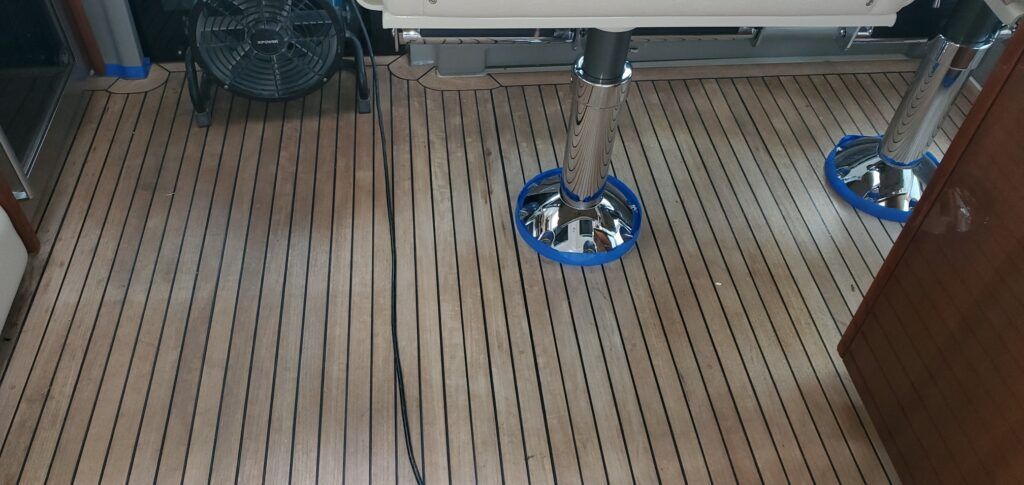

Before Sand-Out

WHEN NOT TO SAND


Sanding will make teak decks as smooth as possible within the limits of safe traction underfoot. But there are some cases where sanding is not the correct next step. Before starting a deck sanding project, the first two steps are to determine (1) the current thickness on the teak deck and (2) the remaining depth of the caulk seams. If the caulk seams are too shallow, the caulk will not stick to the sidewalls of the teak groove because there is not enough surface area to form a good bond. Sanding a deck with shallow seams will lead to caulk seam failures by further reducing seam wall surface area.


If the seams are shallow, but the deck is a traditionally laid deck with rabbeted seams, there may still be enough teak thickness below the seam to cut the seams deeper and then recaulk them before sanding the teak surface. To determine the deck thickness and seam depth, look at the edges of hatches or probing the caulk seams with a penknife. Read these blogs for more detailed information:


How to Assess Teak Decking Quality

How to Inspect Teak Deck Caulking & Seams


If both the teak deck and caulk seams are thin, do not sand the teak deck because it has reached the end of its useful life. Sanding will only lead to more caulk seam failures. If this happens, contact the teak decking professionals at Teakdecking Systems to learn about deck replacement options.


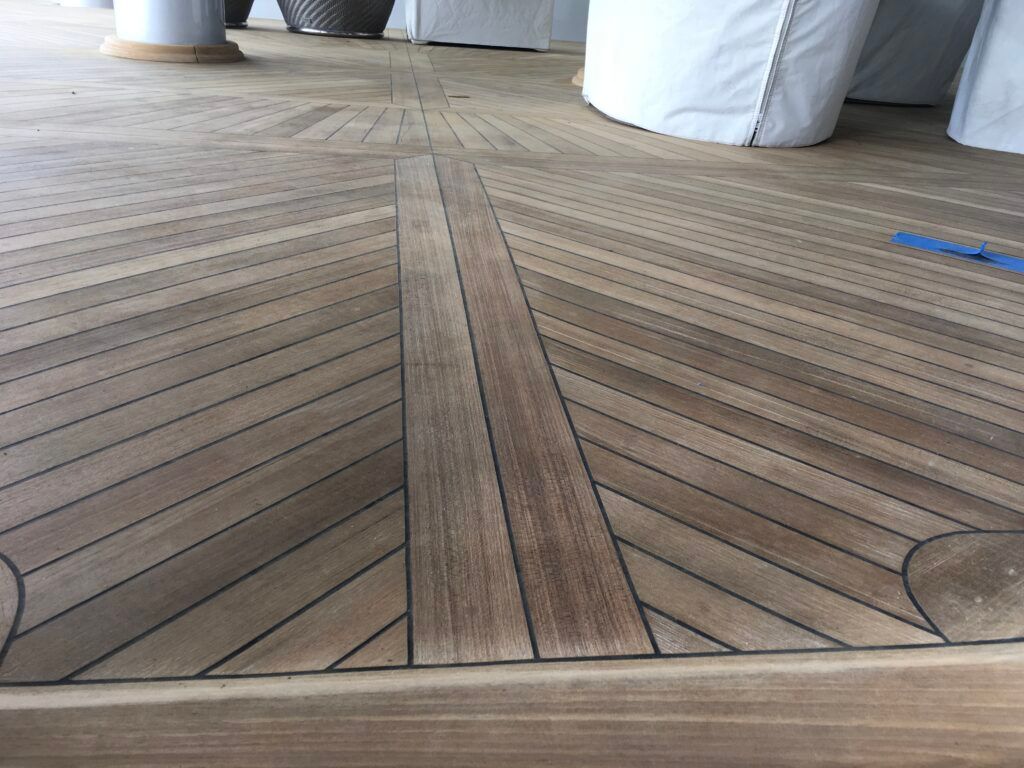
After Sand-Out — Looks New!

HOW TO SAND

If there is enough teak thickness and caulk seam depth for a successful deck sand-out, an optional first step is to wash the deck with Teakdecking Systems’ ECO 100 or 300 Teak Cleaners, to create a dirt-free and pollution-free surface.

As the deck dries, inspect the deck for caulk seam failures. Wherever the edge of a plank stays wet after the surrounding deck has dried, this indicates a seam failure. Water has reached the side of the plank, saturating the wood more deeply. Another reason for lingering moisture may be that the caulking is proud on the teak. This creates a dam that prevents the water from running off the deck.

It might be impossible to determine whether the dampness is due to a seam failure or raised caulking. So, use a single-edged razor blade to shave the caulking down to deck level in that area and re-wet the deck. If the prior damp spot does not reappear, the problem was the elevated caulking. Sanding will remove the elevated caulking.


Proud Caulk — Determine if it needs to be cut down or replaced. Replacement is necessary if the caulking is loose or the seam holds water.

If seam failures appear, mark them with tape. Once the deck has thoroughly dried, make any necessary caulk seam repairs before the general deck sand out.

NOTE: Sanding removes raised caulking; so some technicians prefer to make repairs after sanding, but these repairs must be performed carefully to prevent damage to the newly sanded deck.


Sanding carefully and slowly are the keys to beautifying rather than destroying a teak deck.

TOOLS


VACUUM AND SANDERS

Sanding creates a lot of dust, so a shop vacuum is necessary. Dust attachments on the sanders will reduce the volume of loose dust resulting in a cleaner workspace (and fewer cold stares from the crews on neighboring boats). However, dust gathering is not as important as having the right tools for the job. So do not be lured into using the wrong sander because “it doesn’t make a mess.”

Belt sanders and orbital (jitterbug, palm, etc.) sanders should only be used on a teak deck by highly skilled professionals. Amateur users can easily catch an edge and gouge the teak or create unwanted grain patterns. Orbital sanders work well on the teak. BUT they will only wiggle the caulking rather than cutting it down to the deck surface.

The best sander(s) for resurfacing a teak deck are a 5-6” Dual Action (D/A) random orbital sander and/or a 7” grinder for larger projects. Equip both sanders with the yellow soft pads that accept either Stick-It or Hook-n-Loop sanding disks. These two types of sanders cut in a circular pattern removing caulking down to deck level. If the deck has many corners, a Fein Multimaster sander, or similar, may be helpful.


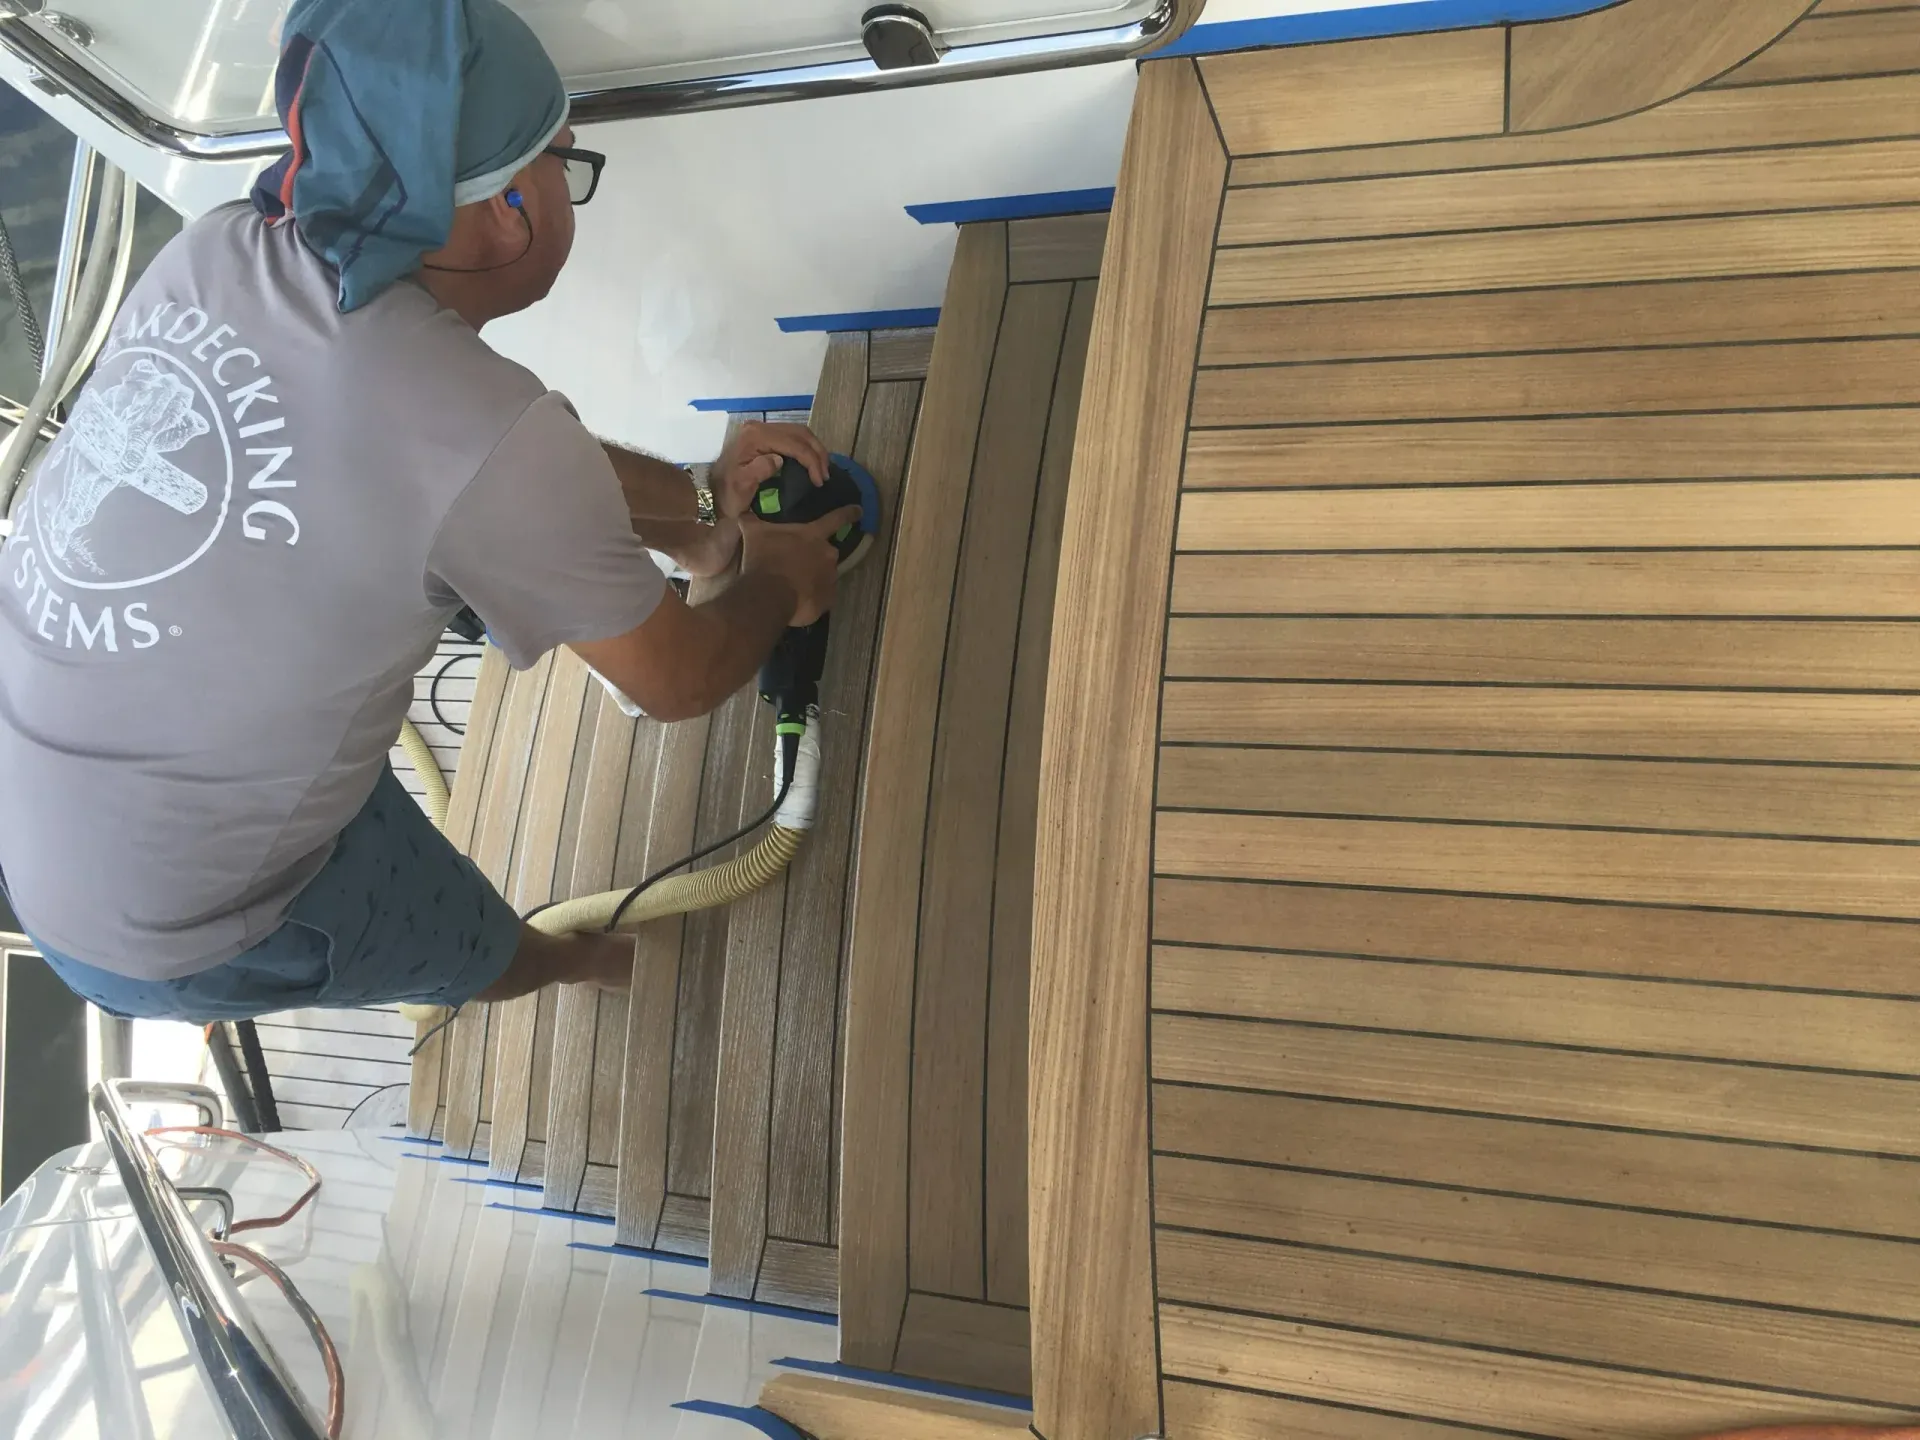
Teakdecking Systems Employee Sands Steps

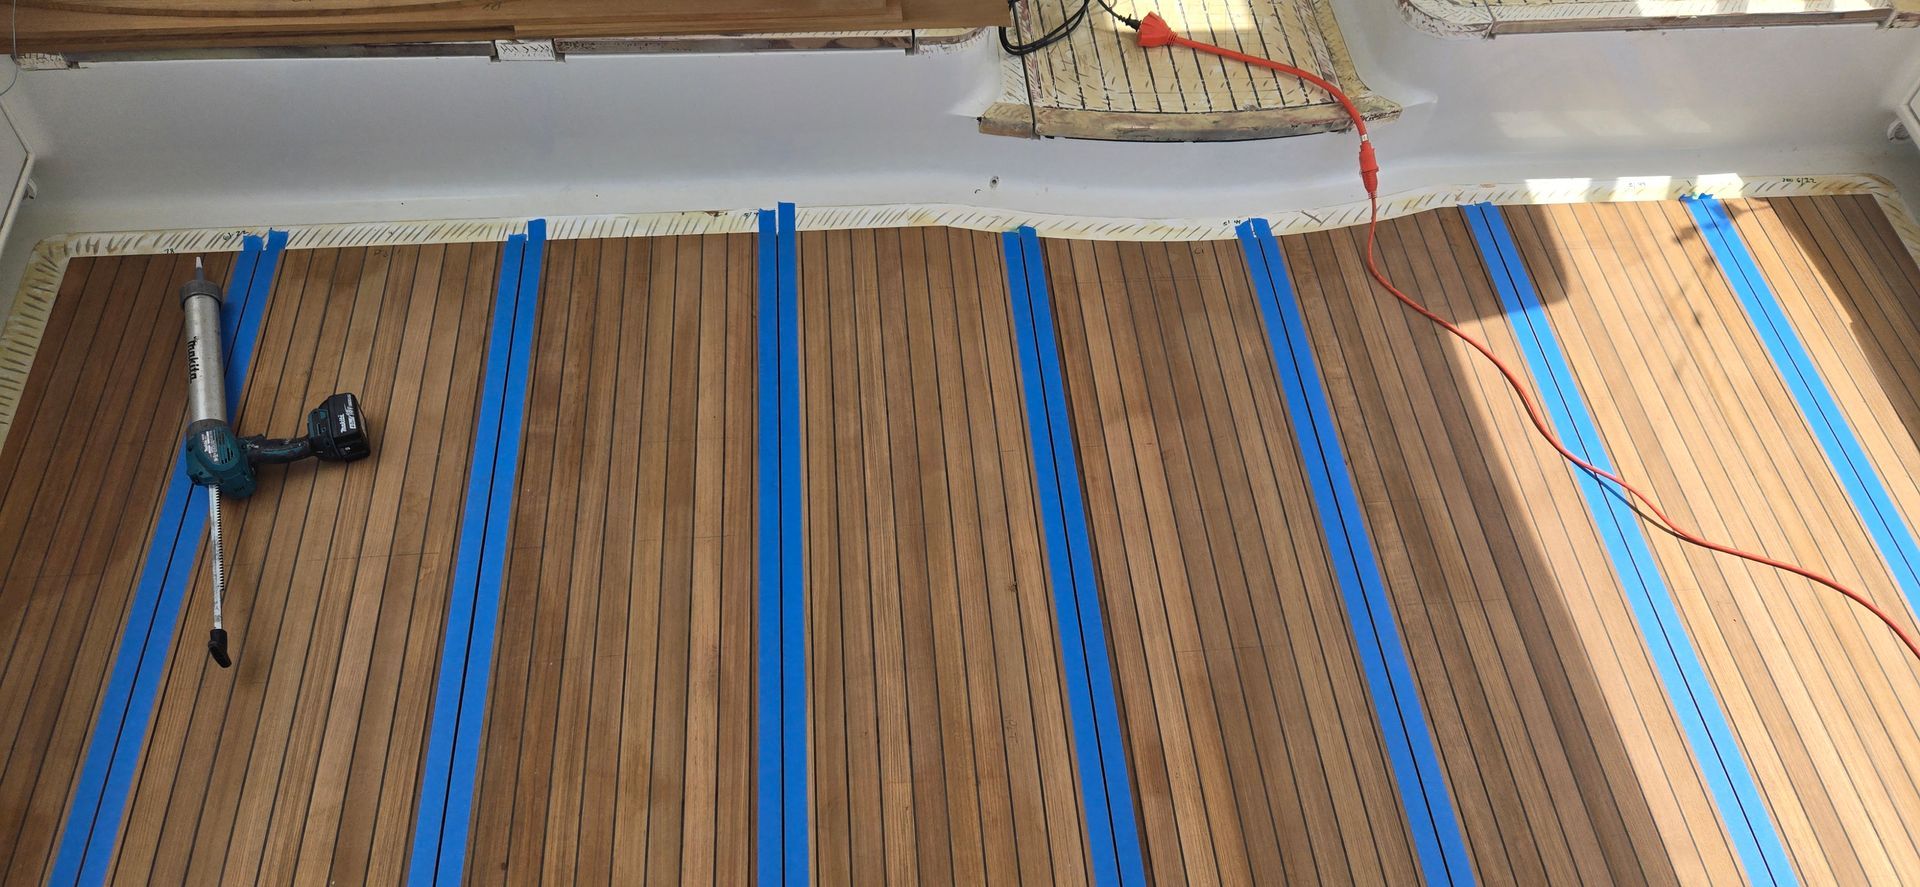
Use a hand sanding block or the final sanding because there will be edges that the power tools cannot reach without causing damage. Finger sanding is taxing, and it is not suitable for the deck because it creates dishes and grooves. So, using a sanding block in locations not easily reach by tools yields the best results. Remember: Teak is a naturally oily wood, so gumming of the grit is common.


More than likely, gel-coated, varnished, or painted surfaces are adjacent to the teak. These finishes could be easily damaged if nicked by either a D/A sander or a grinder. So, it is a good idea to temporarily mask those surfaces needing protection. Thin (1/8”) plywood or sheet metal are suitable for this. Cardboard is not.


Teak is one of the softer of the hardwoods, so it is easy to quickly sand away a lot of teak when too aggressive. So, start with 80 Grit and lightly sand. Adjust pressure, speed, or sanding grit to refine the rate of removal. ALWAYS keep the sander moving over the surface. Pausing in one place will cause the sander to create a depression by removing excess material.


For badly weathered teak, it may be necessary to first use coarser 60 grit disks, but only IF there is enough teak deck thickness. Sanding to an 80-grit finish provides the extra needed traction on a heeled and pitching deck, while power vessels are often finished with 100 -120 grit for a smoother surface. When sanding, keep the disks as flat as possible without losing control of the sander. More surface area is used, avoiding gouging the deck with a disk edge. Sweep back and forth, keeping the sander constantly in motion. If the sander does not have a vacuum attachment, then vacuum frequently. Vacuuming will keep the dust under control and the work area clean, enhancing visibility.


Before Sanding

Before starting the sanding process, decide how much sanding is necessary.


If the deck is relatively thick, with plenty of caulk seam depth, but there are ridges in the deck easily felt with a thumbnail, it is okay to sand the deck surface to the desired smoothness, keeping wet deck traction in mind.


If the caulk seams are shallow and the teak planks are not thick enough to be recut deeper, then sand off proud caulking. This step will give the teak a light dressing. This sanded finish helps shed water a bit better, extending the deck life while determining a replacement plan. Keep in mind that weathered planks will continue to hold water on their surface, accelerating the decomposition process.


WHEN TO STOP SANDING A TEAK DECK


Whether a teak deck is thick or thin, here is a way to gauge when to stop sanding:


A noticeable color change occurs to the sanded teak. The original golden color returns while, at the same time, the teak in the grooves is still the weathered silver color. Watch the silver diminish while sanding. When it is gone, the deck is smooth – STOP SANDING! Wash the deck and check the seams.

NOTE: A Professional move is to stop a little sooner, leaving a silver hint on the planks to avoid over-sanding. During the last step of thoroughly wash the deck to remove the residual mixture of teak and caulk dust. If well sanded and washed, the little bit of silvering will disappear.


While sanding a teak deck, it is possible to discover that some deck areas are in good shape, while others have reached the end of their useful life. Teakdecking Systems often works with owners and captains to replace specific deck areas rather than replacing entire teak decks. When doing a partial replacement, the new decks will have a custom design to match the existing decks on the vessel.


After sanding

For questions about sanding, please contact our team of experts:

yacht.services@teakdecking.com

941-756-0600


ALL PRODUCTS

By Anella Alcott April 11, 2025
If you're planning to get a new deck on your boat, and you've chosen teak, a composite deck, or a cork alternative, this guide will walk you through the full process, from digitization and manufacturing to final installation so you’ll know exactly what to expect from start to finish. TEAK DECKS Digital Templating The first stage involves one of our technicians digitially templating the area using the latest in precise measuring technology. Our team digititally templates vessels all around the world. Engineering Our experienced designers are masters of creating beautiful and technically precise decks using CAD construction program, importing data provided by our digital templating team. Our designers’ exceptional ability to create visual symmetry ensures impeccable finishes and beautiful aesthetic decks. Manufacturing TDS panels are manufactured in our factory utilizing jigs that are adjusted to conform to the vessel’s shape. Teak planks of the required thickness and width are carefully hand inspected, scrutinizing each plank for grain orientation, mineral deposits, or imperfections such as a small knot. The planks are placed into the jig in such a way that the finished deck will have a uniform butt joint pattern. Creating a Watertight Barrier A phenolic or fiberglass backing is securely vacuum bonded to the teak, using our own epoxies that guarantee durability, flexibility, strength and reliability. The exceptional bonding strength, ensures your deck stands the test of time. After the epoxy cures, the newly formed panels are removed from the jig, and the seams between the planks undergo routing, cleaning, and caulking. Margin Trim Once the caulking is cured, the final step involves laying out the teak deck and laying all the margin trim. Upon completion, the finished deck undergoes a thorough quality inspection, ensuring it aligns precisely with the template. Transport & Installation The finished deck panels are placed in custom-made crates and then shipped and installed worldwide. Prior to the arrival of the new deck, the old deck is removed. Our installers inspect for any issues such as water intrusion, delamination, or corrosion on the vessel’s surface. If such issues are found, the areas are repaired before the new deck is installed. Caulking & Sanding Once the deck has been bonded to the vessel, it is time to caulk using our own proprietary, UV, and chemical-resistant caulking TDS SIS-440. After curing, the deck is then ready to be sanded. The entire deck is sanded with 36 grit to remove excess caulking, followed by 60 and 80 grit to enhance the look of the deck. COMPOSITE DECKS Digital Templating The first stage involves one of our technicians digitially templating the area using the latest in precise measuring technology. Our team digititally templates vessels all around the world. Engineering Our experienced designers are masters of creating beautiful and technically precise decks using CAD construction program, importing data provided by our digital templating team. Our designers’ exceptional ability to create visual symmetry ensures impeccable finishes and beautiful aesthetic decks. Manufacturing Every composite decking panel is custom made to perfectly fit the areas to be covered. The panels are delivered with completed seam pattern, sanded and ready to be glued down on most structural surfaces. In the case of SeaSole, the deck is installed using the “peel and stick system”. We use a combination of our TDS bedding and bonding adhesive, along with TDS two-part, flexible epoxy fitting glue, to secure the panels in place. The caulking in the seams is our TDS proprietary patented filler, an enduringly elastic, solid rubber polyurethane joint sealant. Our team will first carry out an inspection of the boat to identify the best application method for each area. Quality Control Once the caulking is cured, the final step involves laying out the composite deck and building all the margin trim. Upon completion, the finished deck undergoes a thorough quality inspection, ensuring it aligns precisely with the original template. Installation The finished deck panels are placed in custom-made crates and then shipped and installed worldwide. Prior to the arrival of the new deck, the old deck is removed. Our installers inspect for any issues such as water intrusion, delamination, or corrosion on the vessel’s surface. If such issues are found, the areas are repaired before the new deck is installed. C ORK DECKS Digital Templating The first stage involves one of our technicians digitially templating the area using the latest in precise measuring technology. Our team digititally templates vessels all around the world. Engineering Our experienced designers are masters of creating beautiful and technically precise decks using CAD construction program, importing data provided by our digitizing team. Our designers’ exceptional ability to create visual symmetry ensures impeccable finishes and beautiful aesthetic decks. Manufacturing Every cork decking panel is custom made to perfectly fit the areas to be covered. The panels are delivered with completed seam pattern, and ready to be glued down on most structural surfaces. Our team will first carry out an inspection of the boat to identify the best application method for each area. Creating a Watertight Barrier After the adhesive cures, the seams between the planks undergo routing, cleaning, and caulking. Installation The finished deck panels are placed in custom-made crates and then shipped and installed worldwide. Prior to the arrival of the new deck, the old deck is removed. Our installers inspect for any issues such as water intrusion, delamination, or corrosion on the vessel’s surface. If such issues are found, the areas are repaired before the new deck is installed. We use a combination of our TDS bedding and bonding adhesive, along with TDS two-part, flexible epoxy fitting glue, to secure the panels in place.
March 28, 2025
Everything you need to know about cork decks As the industry and yacht owners move towards sustainable decking options, we have recently begun working with cork. This decision has been driven by the increasing demand from environmentally conscious customers . As more people prioritize eco-friendly choices in their purchases, cork has emerged as an ideal decking material. Known for its sustainability and numerous environmental benefits, cork offers unique characteristics that not only provide practical advantages but also contribute to a reduced environmental footprint . This makes cork a compelling choice for those looking to make greener decisions. TDS is a distributor for Navicork by Amorim , the world leader in the cork industry , which is leading the marine revolution with cork decks that champion sustainability. With more than 150 years of history, Amorim has made an unparalleled investment in research, innovation, and design, developing a portfolio of products and solutions that set the standard for environmentally responsible decking . Why is cork so environmentally friendly? UNESCO recognizes cork oak forests as one of the 36 most crucial ecosystems globally, highlighting their environmental significance. Cork is one of the most sustainable resources in the world and remains the only truly carbon-negative product on the market. Eco-Friendly & Carbon-Negative One tonne of cork absorbs about two tonnes of CO₂ while producing only 1.6 tonnes during processing. Harvesting cork does not require felling the tree , allowing forests to continue absorbing carbon dioxide. The bark regenerates , ensuring a sustainable and renewable material for generations to come. Lightweight and Durable Cork is significantly lighter than traditional decking materials, 2 to 5 times lighter than teak, reducing overall vessel weight and fuel efficiency. It is highly resistant to wear and tear , making it suitable for high-traffic marine applications. Superior Thermal and Acoustic Insulation Low thermal conductivity (0.065 W/mºK) minimizes condensation, reduces energy loss and keeps decks cool underfoot. The closed-cell structure of cork dampens structural noise , reducing onboard sound levels and acoustic performance. Comfort & Safety Cork’s soft, velvety texture provides superior underfoot comfort , reducing fatigue during long periods on deck. Its natural non-slip properties enhance safety, making it an excellent choice for marine environments. It’s splinter-free and reduces impact injuries compared to traditional hardwood decks. Design Flexibility & Aesthetic Appeal Available in various textures, colors, and patterns, cork decking can be customized to match the design vision of any vessel. Offers a unique aesthetic while still delivering the premium look and feel desired. For more information check our cork decking section
March 11, 2025
What to expect from TDS when you order a deck Once you have decided to order your new deck from us, we have a process in place to ensure that the whole manufacturing and installation goes as smoothly as possible. With a commitment to transparency and customer satisfaction, we have put together some guidelines outlining the most important key steps from the moment that you commit to a new deck from us. 1. Customer Inquiry, Quotation Process and Formal Quote When we are first contacted by a customer, we ask that they send us photos and a layout of the boat via our contact page on our website so that we can understand their specific requirements. Our team then conducts its own research by reviewing the layout and photos provided, as well as gathering information about your boat. Based on this information, we develop a budgetary quote, and if the customer is satisfied with it, we provide a formal quote. The formal quote outlines all the essential details, including design specifications, materials, price and timelines. It is crucial that you read through this document carefully. Taking the time to review it not only helps you understand what to expect but also gives you an opportunity to ask questions or clarify any uncertainties before signing. Once the quote is acceepted, we issue a pro forma invoice for the templating/digitizing, after which we will organize a date to digitize the deck. Once we have the digital file, our sales and project management teams meet to review both the quote and the digitized layout to ensure that the quoted square footage is accurate. Should there be any discrepancies, we adjust the quote accordingly and will call you to explain the changes. 2. Securing Your Order with a Deposit After both parties agree on the final numbers, we send an order confirmation for your signature and will then send an invoice for 50% of the materials cost and the cost of digitization so that we can begin building the deck. Once the funds are received, we start production, later invoicing for the remaining 50%. Travel costs associated with the digitization are invoiced separately after the activity has concluded. 3. Project Management and Timeline Confirmation We will assigns a dedicated Project Manager to your deck, and they will be your primary point of contact throughout the entire process. Your Project Manager is responsible for confirming the production and installation timeline and ensuring that every phase of the project is scheduled appropriately. They will communicate any updates, answer your questions, and address any concerns that may arise during production. 4. Final Payment and Scheduling Shipment Before the deck is shipped and installed, we require that the full remaining balance is settled and we can then schedule shipment and installation without any delays. 5. Installation You will have received an estimated quote for installation. Once the deck is installed we ask the captain or project manager to walk the deck with our team and get a sign off and release for the deck and then we invoice them for the final amount along with any associated travel, travel time, accommodation and subsistence. We will invoice you the final amount once the installation has been done.
ALL ARTICLES